Friday, February 27, 2015

Hop with Eileen Hull's ATB and Stampendous!

It's time for a hop around the Block!

Artist Trading Block that is!

                             
I am up today!

I hope you have been hopping along! So many great ideas! Many different styles!


I received the Cling Hydrangea Garden stamps #CRS5067, with that I also received the matching cutting die set and something that I had never used before. It is called Spoonful of gold dust, Embossing Powder & Elements. Have to say.......I LOVED IT! 


 I colored every element with my Prismacolor pencils and blended them with Gamsol.

After everything was colored and blended, I took the Spoonful of gold dust and sprinkled some on the flowers and the butterflies and heated them from underneath the sheet of paper. What a spectacular effect it gave! OM-gosh I can't wait to get some of the rust!!!!

I liked it so much I choose to use the Sizzix Little Sizzles black Mat Board so that I could sprinkle the Artist Trading Block with the GOLD DUST! Oh yeah! It looks FABULOUS! Using the Sizzix black Mat Board I did have to leave my heat gun on a little longer and moved it around so not to burn the Mat Board.


I used the largest ATB and I stuck a Styrofoam ball into the box so that I could arrange my floral arrangement!
I had some twigs that broke off of a twig wreath and thought that would make great stems for my flowers and give some added interest. I used very, very thin wire to adhere the butterflies to so that they look like they are flying.


 I really like the way this ATB turned out! 
It has depth and interest and 
it is full of GOLD!


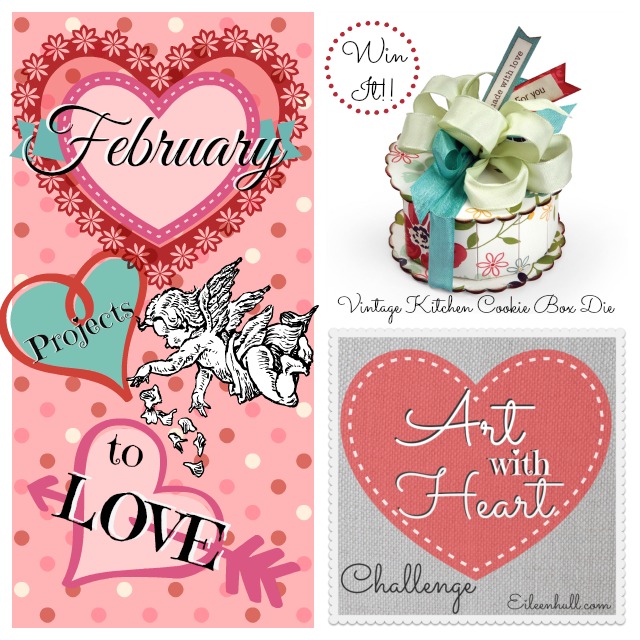
We know this form of crafting will spark your interest and give your mojo a serious boost! That’s why we have prizes!!! We’ll choose three winners at random from the comments on all blogs in the hop. Then from those three we’ll randomly pick a GRAND PRIZE winner! Two of the winners will receive Stampendous PenPattern Petal and PenPattern Flutter cling stamps. They’ll also receive enough pre-cut, premium matboard from Sizzix to make two boxes of your own, plus some extra pieces for fiddly bits! The Grand Prize winner will receive the stamps as above, a whole package of matboard, AND the Sizzix die to cut your own ATB boxes! Uh, WOW!
If that weren’t enough, eligibility for these amazing prize packages has expanded to include our international fans too!


We know you won’t want to miss a single creation in this hop, and the Eileen Hull Designs Inspiration Team has several members that live outside the United States, so it took a while for them to get their products from us. We need to give them time to post and you time to comment, so the comment deadline will be Sunday, March 8th. A whole extra week! We will continue posting links as we receive them from the Inspiration Team, so be sure to keep checking back. You get one entry for every comment, so you don’t want to miss the chance to leave a thoughtful comment on each project. For those who tend to get lost, we’ll post a “cumulative” link list of links so far on Saturday, February 28th and Saturday, March 7th. Then you can check your progress.
Here are the designer’s participating today —

Stampendous Blog

Pam Hornschu
Asia King
Jamie Martin
Kristine Reynolds
Janelle Stollfus
Amy Hurley-Purdie
Tenia Nelson
Wendy Price

Lea Kimmel

Eileen Hull Blog

Anna-Karin Evaldsson
Anne Redfern
Donna Budzynski
Diana Hetherington

You can find all of the Fabulous Stampendous products used in these gorgeous projects and connect with Stampendous by following the links below:
Shop Stampendous
Stampendous Blog

Looking for Sizzix dies to use your Stampendous products with?  You can find Eileen Hull's complete catalog below:
Shop Eileen Hull Sizzix Dies

Monday, February 23, 2015

Vintage Window Frame Makeover


It's time I use one of my window-less windows to do something!
So let's make a home decor tac board to hold my ideas and pictures!

Materials Needed:
Old window frame
Plaid Folk Art  Home Decor Chalk paint - Cascade
Plaid Folk Art Home Decor Wax - Clear and Antique
Brushes
Lint Free rags
md hobby metal sheet - Elliptical
md metal snips
md gloves
Aleene's Fast Grab Tacky Glue
1/4" piece of wood to fit in window x 2
Muslin flower
Fabric
Batting
Vaseline
Misc. metal to decorate


1. Prep your surface for painting
2. If you like a more chipped look. Add Vaseline in a few areas where you want the paint to rub off.
3. Paint on two coats of Plaid Folk Art Home Decor Chalk paint-Cascade, wait 2 hours between each coat. At this same time paint one of the wood panels cut.
4. Add Plaid Folk Art Home Decor Clear Wax and let cure overnight. Buff to desired sheen. Also panel.
5. Add Plaid Folk Art Home Decor Antique Wax over the entire surface, wiping back some areas and letting the crevices sit. Let cure overnight and buff to desired sheen. Also panel.
6. Cut md metal sheet using md metal snips.
7. Take the painted panel and metal panel and pin in place using a piner or you could use glue and adhere in place.
8. Cut fabric and batting to fit over third panel. Wrap panel with fabric and adhere into place using Aleene's Fast Grab Tacky Glue. Pin this last panel into place.
9. Add any extra embellishments at this time.
10. Add hanger to the back.

 Paint on chalk paint.

You can see where the Vaseline was wiped off.
 Panels are cut.
 These MD snips work fabulous!
Talk about a FAST GRAB TACKY GLUE!

 Finished pictures


Hope you enjoyed!

Friday, February 20, 2015

Chippy Chair Redo!

This chair was headed to the dump! 

I had to intercept and SAVE it!
 As you can see it is pretty worn, it wobbles, but not done in this life!

Materials Needed for this project:

*Old chair
*Plaid Folk Art Home Decor Chalk paint-Parisian Grey
*Plaid Folk Art Home Decor Wax-Clear
*Plaid Folk Art Home Decor Wax-Antique
*Plaid Craft wax and chalk finish paint brushes
*Lint free rags-extra rags for hands
*Screwdriver
*Vaseline

I cleaned the chair and made sure all of the screws were all tight. Sanded any of the loose areas of paint. I did not sand hard, I wanted this chippy look to shine through.
 Before starting my base coat I caked on some Vaseline in areas where I did not want the Plaid Folk Art Chalk paint to stick. Paint right over it.
This is what the chair looked like after base coat and clear wax were applied and cured.
Time to buff out using a soft lint free rag.
Time to apply my Plaid Folk Art Home Decor Antique Wax. Let cure overnight. Using a lint free rag, buff to the sheen you desire.
At this point, I wanted some words on my new chair. I went to Pic Monkey and chose the wording and style I wanted and printed it out. Using transfer copy paper I transferred the words to the chair.

Using acrylic paint I painted the letters. I did put a coat of the Plaid Fold Art Home Decor Clear wax over the letters and let cure. Again I buffed it out and now I have a CUTE chair for my studio!


 I can use it, I can decorate it. I can use it as a prop!


I LOVE IT!!!


Thursday, February 19, 2015

Easy and Fun Garden Flag

Are we sick of winter yet? yes, yes, yes!

Ready for SPRING?  Duh?

Well I have something for you to work on while you wait for spring!

Let's make a Fun and Easy garden flag! 
Finished size is 11" X 18"

This great fabric is fun, bright and super easy to use!
Some super fun names of the fabric.....
Orange Crush
Bubble Gum
Kiwi
Jelly
Sea Green
These are just a sample of them!

What is this Fabric called?
It is called oly*fun!
This is made by Fairfield.

It comes in so many great colors!
Another fun fact....it does NOT fray! No hems...if you don't want to!
It can go outside or inside!

 Materials Needed:

oly*fun-variety of colors
Sky blue
Orange crush
Black
Sea green
Blueberry
Kiwi
Bubble gum
Orchid
Jelly
Yellow
Brown

Embroidery Thread to match
2 black buttons
3 misc. buttons
1 metal rod or wood dowel
Black cord for hanging
Needle
Sewing machine (optional)
Clover Kanzashi flower maker (optional)
Sizzix Eileen Hull die - bird
Die cut machine

Instructions:

1. Draw out project (or copy mine)
2 Cut 2 - 11" X 20" of Sky Blue oly*fun (this will be your front and back of flag)
3.Using your drawing cut out house, butterfly, leaves, etc...also cut bird using your sizzix die.

4. Pin on pole and hand stitch it to front of flag
5. Pin base of house on and hand stitch it to the front of flag just above the pole

6. Pin roof, base and birdhouse hole onto base of the birdhouse and hand stitch them
7. Pin butterfly body and bird on and hand stitch. Add wings of butterfly over the body base and stitch
8. Hand stitch a dotted line behind the butterfly to resemble her flight
9. Using the Clover Kanzashi flower maker, make 3 flowers and stitch onto flag
10. Hand stitch stems and leaves to each of the flowers
11. Machine stitch front of flag to back of flag
12.Turn 2" over on top to make a pocket for the rod to go through. I stitched the 2 black buttons on to hold it in place. Add you rod into the pocket and tie cord around rod and hang

***It would be really fun to use your child's drawings to make flags. It would be fun for them to see their art in the yard or even on the front door!

Last shot of the flag.

I hope you enjoyed this project as much as I did! I am going to try and find some kids art and make a banner with it! I think that is a GREAT idea!

Here is a pattern you can use. Print it out on a letter size paper and it should be the right size.
The pole size is 9 1/4" X 1 1/2"


Friday, February 13, 2015

Officially a Crew Member!

 Today is the day of the unveiling of the 2015 Canvas Corp Brands Creative Crew. Each member was asked to submit a 4" X 4"canvas, designed by them, that shows who they are as a designer. 

I am a Creative Crew member!

                                                   It is a BIG crew, so much Talent!!!


 This is my canvas! I love how it turned out! It looks rusty and old and recycled! That is what I was going for! This canvas is made up of vintage watch parts, vintage key, vintage lace and recycled cardboard and paper. I used the 4 X 4 canvas from Canvas Corp and the Canvas for the tattered flower. I painted and stained the canvas and the paper to make it look vintage and rusty. Then some splatter to finish it off.

 Make sure you go take a look at all of the 4 X 4's at the Canvas Corp Brand Blog, you won't be disappointed! You can even vote for your favorite! But like I said....so much talent and you can only vote ONCE!

Thanks for stopping by!
Leave me a message let me know how I did!
I would love it!!!!

Happy Valentines Day!

Tuesday, February 10, 2015

Art with Heart Challenge – Projects to Love

Art with Heart Challenge – Projects to Love

I was playing around with the Cookie Box die by Eileen Hull and wanted to make something not what it was intended for!
I came up with a cute little container with a handle! Perfect to fill with your favorite things!


Super easy to make! I cut 2 of the main rounds and then the insert.
After you cut the insert with your machine, you then just cut off 1-1/2 section off of each side.
Glue it together and add a handle!


  I love this Cookie Box die. 
  So much you can do with it!!!!

Guess What?

If you join in this month at Art with Heart Challenge.....
You could WIN the Cookie Box die! 


So what are you waiting for? 

Get creating!!!!


February Art with Heart Challenge "Projects to Love" Sizzix Prize Pack | Eileenhull.com

I also was playing with my ATB die and came up with a tower of LOVE!

I call it "Just One Kiss" There is just one kiss in the top ATB. I thought it was just something fun!

Then I started to play with editing pictures and this is what I cam up with. Just messing around!

I think I should have retaken these pictures. I have to say when I took them it was just to sunny! Mind you I am not complaining!!!


Please join us this month at Art with Heart! Add your entry HERE!

Thanks for stopping by!

Thursday, February 5, 2015

Random Love

Random Love!


Hi All!
Bet you thought I was lost forever!
First Christmas, I was off to CHA next, came home for 5 days and off to Minnesota to see family and now I am home and ready to start the new year! I know it's February! But I have to start somewhere! LOL! 

First I have been holding out on you! 
Yes, its true! I have had a secret............!

I am now a member of a new DT! Canvas Corp Brands has asked me to be a Crew Member!
I was am so excited!
Our first mission was to create a card and envelope for Valentines day and send or give it to someone who is not expecting it. So What I choose to do is............................
Not send it to anyone, but drop it in a random place for someone to find it!

This is why I call it Random Love!

This world needs more LOVE! The headlines have been horrible and if just one person sends some Random Love and then that person gives a smile to someone and then that person buys someone a coffee....so on and so on. This one piece could effect more then just one! Wouldn't that be great?
So if you live in Colorado, you just might see this laying around waiting to be found!


Materials used:

Canvas Corp Black & Kraft Ribbon Stripe
Canvas Corp Kraft Envelope and Card
Sewing Machine 
Black thread
Stencil
Red Acrylic paint
Glue Dots® Glue Lines
Simple to put together

Cut Canvas Corp Black & Kraft Ribbon paper to fit just inside of card
Cut a piece of Kraft paper to fit onto the Black & Kraft paper
Stitch the word love onto the Kraft paper
Cut out heart freehand and stitch heart and scraps onto Kraft paper as shown
Stitch Kraft paper onto Black & Kraft Ribbon paper
Add paint with stencil (optional)
Adhere to card using Glue Dots® Glue Lines

Hope you enjoyed! Thanks for stopping by!

Have a great day!

Creative Paperclay® Date Book Cover


I am up on Creative Paperclay® Blog today!

Please go check it out HERE!


Thank you!