Tuesday, July 19, 2016

Sneak Peek!


I am so excited about this post!!!

Have you ever created something that just makes you grin from ear to ear?

Well......This is one of those projects!

I had so much fun sculpting, painting and creating it was like time stood still for me. I was in this glorious place of creating and loving and cherishing every minute of it.

With all of the bad things that have happened in the world, this just took me away. Just for a bit and I loved it.

I used bright bold colors! It was like playing with a rainbow!!!


If you want to see this and learn how to make one for yourself, you will have to visit Resin Craft blog HERE!

Don't be afraid, leave a comment on Resin Craft blog and let me know what you think!!!

Thanks for stopping by!


Thursday, July 14, 2016

Under the Sea!

Oh my goodness!!! 

I am so happy to share with you this fabulous
fun, bright fishy project with you! 

I have had my two granddaughters here with me visiting and we went to see Finding Dory! It was so hot the day we went! We were wishing we were in the Sea swimming with the fish! It was so much fun and GREAT inspiration for this piece!

Some of you know I love to draw and paint. So what is better than to combine the two together!!!

I will show some of the steps that were taken to achieve this beautiful bright fish with the beautiful bubbles.......if I do say so myself!!!!


The first thing I did was sketch out where I wanted the fish and how she was to look. Once that was done, it was time to grab my DecoArt Media paint and get started! If your not familiar with DecoArt Media paint it is a Fluid Acrylic paint. You can read about them HERE.


I grabbed every color that was bright! Very unusual for me!


I started with the background and when I pretty happy with it I went on to the fish!
 I didn't follow all the lines that I drew and I added different details that I did not draw!
These DecoArt Media colors are so FUN!!!!


I LOVE the Green Gold, it is so pretty!


 I continued to add color and decided on rainbows for the fins!

And those BUBBLES!!!   I just love how they turned out!

I thought why not try some Glitter Glass on parts of the painting? Let's give it a try and see what happens.

 Beautiful!


I added some to look like coral at the bottom of the picture. I added the white thinking coral is white and it would be pretty, see what happens after the resin was applied!!!


Using EnviroTex Lite I mixed it according to manufacturer’s directions.
Add part A and part B together and mix for 2 minutes. If you would like to learn more about EnviroTex Lite please go HERE.

  
Pour into first cup and mix for 1 additional minute.


And pour over painting! I had never used this product so I was ohhhh so nervous!!!!


Look at all those bubbles, I thought I may have done something wrong! But NO, it happens and you can use a lighter and or a straw to remove them!

WHEW! Was I nervous!!!!


So, so happy with the way this turned out! 

My biggest dilemma was that both of the grand kids wanted it!!! Oh NO, how do I choose???

My niece has a little girl who has her room decorated with under the sea decor, she gets it!!!


One last thing........White Glitter Glass does not show under the resin!!!

It's GONE!!! 

Always learning something new!

Wednesday, July 6, 2016

Child's Room Decor with EnviroTex Lite®


I would love for you to visit Resin Crafts blog to see how I made this fun piece!


Resin Craft Blog HERE!


Thanks for stopping by!

Monday, June 27, 2016

Party Favors!

Are you having a 4th of July party? 

Do you want some really cute party favors?

Well you have come to the right place!

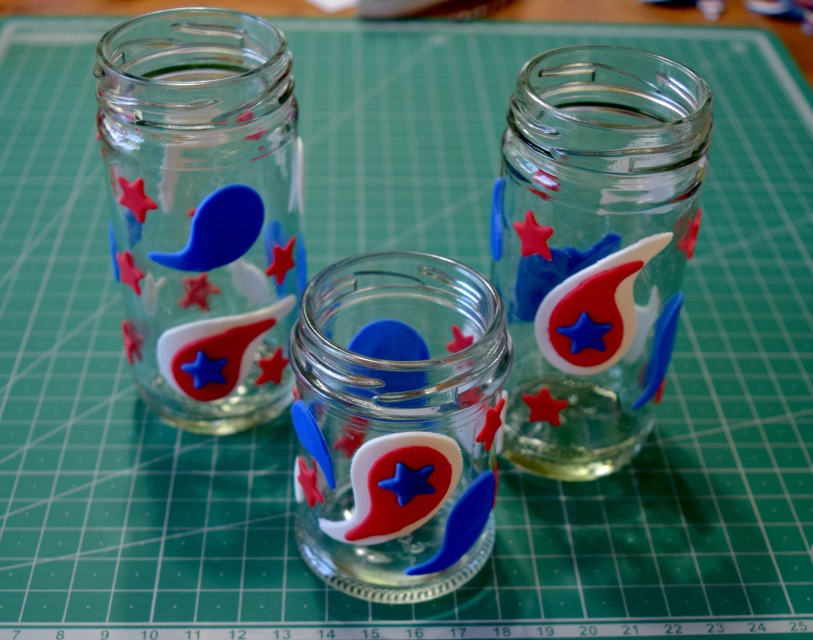
These little jars are a quick and easy favor to give to your guests.


What you will need:
Small glass jars with lids
Makin's Clay® Red,White and Blue
Makin's® cutters Water Drop
Misc. small star cutter
Roller or a clay machine I used my Makin's Professional® Ultimate Clay Machine®
Red paint


Roll out Blue clay and cut your shapes using each of the 3 sizes. As soon as they are cut you apply them to the jar, they will stay without any adhesive.
Repeat this step for all three colors.


 Roll out your Red clay and cut stars, apply right away.


 Jars are done. Paint lids with red paint.


 Fill your jars with Red, White and Blue M & M's and or Kisses! Place painted lid on, tie with ribbon or raffia and place them on your table scape to add a fun and festive look!
Love the way these turned out!


Wednesday, June 22, 2016

Makins Clay® Day!

It's my turn to post on Makin's Clay® Blog HERE!

Come see how to make this cute patriotic pin for July!


Thanks for stopping by!

Tuesday, June 21, 2016

Dress Form Art

Like my dress forms?

Come check out what Canvas Corp Brands said on the blog today!

Click HERE!


This is just a sneak peek!

Eileen Hull and Crescent Framed Together!

Eileen Hull and Crescent Collaborate!


Today I have chosen to work with Crescent Photo Mat Art Board.
Eileen's new Flower - Heart & Soul
You will also need:
Crinoline fabric
Deco Art Media products
Card stock - I used Tim Holtz
Stencil
Beacon Fabri-Tac adhesive
Distress ink - Vintage Photo


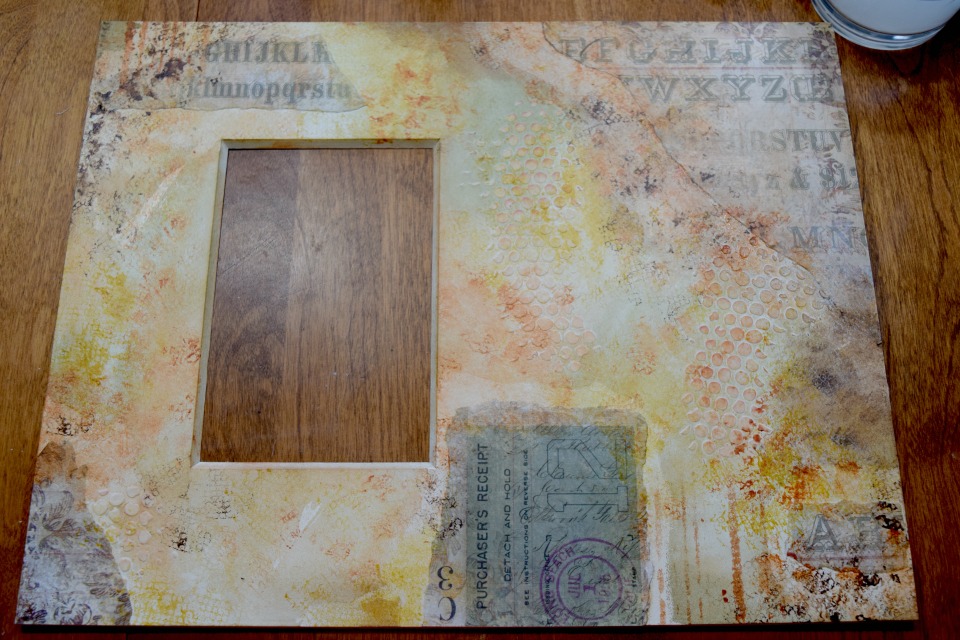
Using a stencil and DecoArt Media Modeling Paste, add some texture onto the Mat Art Board


Tear some paper and place on Art Board, move them around till they appeal to you
Using DecoArt Matte Medium adhere the torn papers to the Art Board

Here is mine

I decided to add some distress inks. Now set aside to let the Modeling Paste dry

Let's make flowers!
Love, LOVE, Love these new flower dies!
I am mixing new with the old. Really, the old are not that old!
Using Crinoline fabric cut out a bunch of flowers using the die Heart & Soul and the 
Thinlits Flower & Leaf Stitchlits


I made 2 large flowers and 4 small flowers


Lots of petals used. I wanted the flowers to really be full. This flower I used the sepal as a center to make it look like it is still opening


Adhered the 3 petals together and then the next three loosely adhered


Finished flower is GORGEOUS!

I also crumble the cuts to make the flowers look fuller.


Let's get our paint on to this Art Board.

I am using these colors for my palette.

I just lightly applied the fluid acrylics with a damp paper towel. I kept applying until I felt it was finished.
I used the computer to print out my saying and distressed the paper and inked it and adhere it to the Art Board using pop dots.

I adhered the flowers on with Beacon Mixed Media adhesive.

I also added a key hole  and some beautiful gems to the piece.

I still felt it was not done and added some distress inking using Tim Holtz's distress ink Vintage Photo


I have to say, I LOVED the way the paints and mediums went on to the Crescent Art Mat Board. I did receive this free as part of the collaboration but, in my opinion this is a great substrate to work with and I enjoyed working with it very much and would use it again and recommend it!

Once I was in LOVE with my piece, I added a vintage photo of my grandparents.


Popped it in a frame and it is Stunning, if I do say so myself!


Make sure you check out what the other DT members have done this month. Go to Eileen Hull blog to check it out!