Showing posts with label Eileen Hull Designs. Show all posts

Tuesday, June 21, 2016

Eileen Hull and Crescent Framed Together!

Eileen Hull and Crescent Collaborate!


Today I have chosen to work with Crescent Photo Mat Art Board.
Eileen's new Flower - Heart & Soul
You will also need:
Crinoline fabric
Deco Art Media products
Card stock - I used Tim Holtz
Stencil
Beacon Fabri-Tac adhesive
Distress ink - Vintage Photo


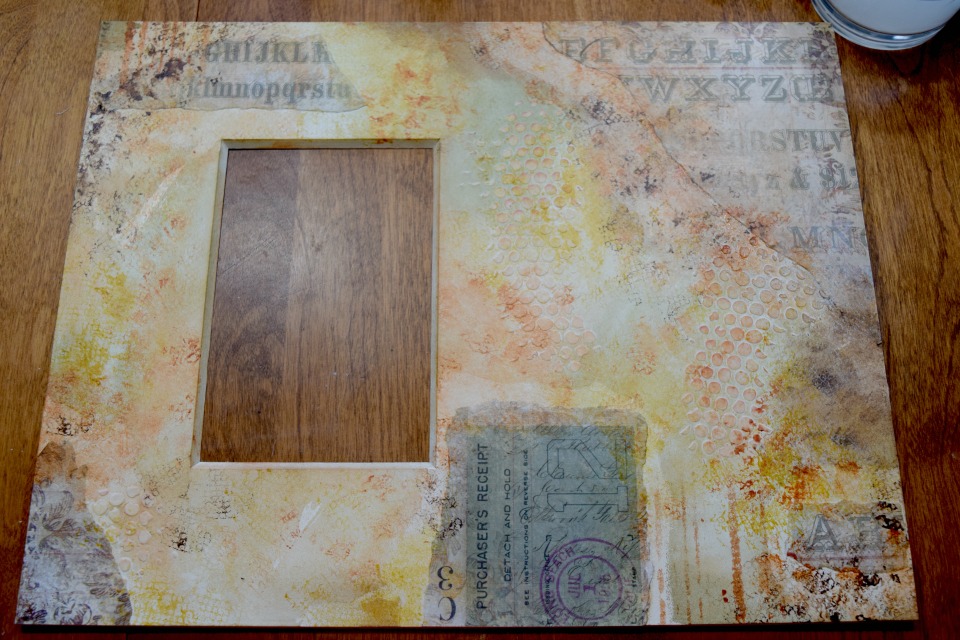
Using a stencil and DecoArt Media Modeling Paste, add some texture onto the Mat Art Board


Tear some paper and place on Art Board, move them around till they appeal to you
Using DecoArt Matte Medium adhere the torn papers to the Art Board

Here is mine

I decided to add some distress inks. Now set aside to let the Modeling Paste dry

Let's make flowers!
Love, LOVE, Love these new flower dies!
I am mixing new with the old. Really, the old are not that old!
Using Crinoline fabric cut out a bunch of flowers using the die Heart & Soul and the 
Thinlits Flower & Leaf Stitchlits


I made 2 large flowers and 4 small flowers


Lots of petals used. I wanted the flowers to really be full. This flower I used the sepal as a center to make it look like it is still opening


Adhered the 3 petals together and then the next three loosely adhered


Finished flower is GORGEOUS!

I also crumble the cuts to make the flowers look fuller.


Let's get our paint on to this Art Board.

I am using these colors for my palette.

I just lightly applied the fluid acrylics with a damp paper towel. I kept applying until I felt it was finished.
I used the computer to print out my saying and distressed the paper and inked it and adhere it to the Art Board using pop dots.

I adhered the flowers on with Beacon Mixed Media adhesive.

I also added a key hole  and some beautiful gems to the piece.

I still felt it was not done and added some distress inking using Tim Holtz's distress ink Vintage Photo


I have to say, I LOVED the way the paints and mediums went on to the Crescent Art Mat Board. I did receive this free as part of the collaboration but, in my opinion this is a great substrate to work with and I enjoyed working with it very much and would use it again and recommend it!

Once I was in LOVE with my piece, I added a vintage photo of my grandparents.


Popped it in a frame and it is Stunning, if I do say so myself!


Make sure you check out what the other DT members have done this month. Go to Eileen Hull blog to check it out!

Wednesday, February 24, 2016

Along the Garden Path Blog Hop

The Inspiration Team is joining forces with the Stampendous DT so come “hop” Along the Garden Path with us.  Every day this week we’ll have projects featuring the Cottage Home and Mushroom Home Stamps and Dies Sets to add detail to my versatile Eileen Hull Sizzix Collections including the  Vintage Canister Scoreboard Dies  and more!

Stampendous and Eileen Hull for Sizzix Along the Garden Path Blog Hop

Three lucky winners will win their choice of Cottage Home or Mushroom Home plus pre-cut matboard from the Sizzix Scoreboards Canister Die. Sponsored by Sizzix. Deadline to comment is February 28th and winners will be announced early next week. See Official Contest Rules for details.

Stampendous and Eileen Hull for Sizzix Along the Garden Path Blog Hop Prize Pack

My piece was inspired by the Mushroom house and it instantly made me think of Alice in Wonderland! So this is my take using Stampendous and Eileen Hull's Dies together!
Materials Needed:
Card stock brown/cream
Sizzles Mat Board
Easy-Cut Adhesive
Image to put in Key Hole

Tools Needed:
Die Cut Machine - I used my Sizzix Big Kick
Colored Pencils - I used Prisma
Ranger Jet Black Archival Ink
Crackle Paste - Wendy Vecchi
Key Hole Die - Tim Holtz

Directions:

1. Die cut your Mushroom House using cream card stock


2. Using Easy-Cut Adhesive adhere brown card stock to Mat Board

 3. Die cut 2 covers from the Passport Book Die


4. Using the Key Hole Die cut through Mushroom House and one cover

 5. Stamp your images using Stampendous stamps and Ranger Archival ink


6. Time to color your image.

7. On the cover with key hole cut out, I stamped bricks and colored them in and then decided I would like to add some texture. Using a pallet knife I added texture paste around the stamped brick. Allow to dry and crackle.

 8. Once dry I added more color to the bricks and to the top of the crackle paste.


 9. Adhere Mushroom House using pop up dots


10. On the other cover, on the non covered side I added a image of Alice. Adhered this to the front using pop up dots. This gives my Art piece a very dimensional look.


Thanks for stopping by and I hope you enjoyed my piece that was inspired by the Mushroom.

Make sure you visit all of the Design Team Members on both teams!

Tuesday, February 16, 2016

Another 10 Minute Project!

That's Right, I am doing it again! 

I have another 10 minute project and it is a GREAT one!

The challenge is.....Clean and Simple...10 minutes and under!

Art With Heart Challenge | Eileenhull.com


***Disclaimer....To make this a 10 minute project, you must know where everything is!!! LOL!

Take along color box with paper and crayons!


Materials Needed:
6" X 12" Card stock
Mat board - Sizzles Mat board is what I used
Button
Crayons
Plain Card stock 

Tools Needed:
Die Cut Machine - I used Big Kick
Glue Dots® Lines
Glue Dots® Ultra thin
Easy Cut Adhesive - sheets
Velcro
Paper Trimmer

Let get started............Have everything ready to start


 1. Adhere the Easy-cut Adhesive sheets to your 6" X 12"


2. Once both sheet are adhered pull top sheet off and lay mat board over your adhesive and smooth over to make sure it is adhered nicely.


 3. Using the Recipe Box Die, run it through the die cut machine.

4. Adhere side with Glue Dots® Lines or Glue your choice! Put together.


5. Adere Velcro onto the inside of lid and box. Adhere button using Glue Dot® Ultra thin or glue.

 6. Die cut plain paper for inside your box using Recipe Card & label die. Cut as many sheets as you would like.

You know have a traveling art kit for the kiddos to take with on those boring car rides or pull this out at the restaurant when they are getting antsy!


 PS....Stickers would be really fun addition to the box also!

Make sure you head over to Eileen's blog and see all the other DT members inspiration in 10 minutes or less!

Friday, February 27, 2015

Hop with Eileen Hull's ATB and Stampendous!

It's time for a hop around the Block!

Artist Trading Block that is!

                             
I am up today!

I hope you have been hopping along! So many great ideas! Many different styles!


I received the Cling Hydrangea Garden stamps #CRS5067, with that I also received the matching cutting die set and something that I had never used before. It is called Spoonful of gold dust, Embossing Powder & Elements. Have to say.......I LOVED IT! 


 I colored every element with my Prismacolor pencils and blended them with Gamsol.

After everything was colored and blended, I took the Spoonful of gold dust and sprinkled some on the flowers and the butterflies and heated them from underneath the sheet of paper. What a spectacular effect it gave! OM-gosh I can't wait to get some of the rust!!!!

I liked it so much I choose to use the Sizzix Little Sizzles black Mat Board so that I could sprinkle the Artist Trading Block with the GOLD DUST! Oh yeah! It looks FABULOUS! Using the Sizzix black Mat Board I did have to leave my heat gun on a little longer and moved it around so not to burn the Mat Board.


I used the largest ATB and I stuck a Styrofoam ball into the box so that I could arrange my floral arrangement!
I had some twigs that broke off of a twig wreath and thought that would make great stems for my flowers and give some added interest. I used very, very thin wire to adhere the butterflies to so that they look like they are flying.


 I really like the way this ATB turned out! 
It has depth and interest and 
it is full of GOLD!


We know this form of crafting will spark your interest and give your mojo a serious boost! That’s why we have prizes!!! We’ll choose three winners at random from the comments on all blogs in the hop. Then from those three we’ll randomly pick a GRAND PRIZE winner! Two of the winners will receive Stampendous PenPattern Petal and PenPattern Flutter cling stamps. They’ll also receive enough pre-cut, premium matboard from Sizzix to make two boxes of your own, plus some extra pieces for fiddly bits! The Grand Prize winner will receive the stamps as above, a whole package of matboard, AND the Sizzix die to cut your own ATB boxes! Uh, WOW!
If that weren’t enough, eligibility for these amazing prize packages has expanded to include our international fans too!


We know you won’t want to miss a single creation in this hop, and the Eileen Hull Designs Inspiration Team has several members that live outside the United States, so it took a while for them to get their products from us. We need to give them time to post and you time to comment, so the comment deadline will be Sunday, March 8th. A whole extra week! We will continue posting links as we receive them from the Inspiration Team, so be sure to keep checking back. You get one entry for every comment, so you don’t want to miss the chance to leave a thoughtful comment on each project. For those who tend to get lost, we’ll post a “cumulative” link list of links so far on Saturday, February 28th and Saturday, March 7th. Then you can check your progress.
Here are the designer’s participating today —

Stampendous Blog

Pam Hornschu
Asia King
Jamie Martin
Kristine Reynolds
Janelle Stollfus
Amy Hurley-Purdie
Tenia Nelson
Wendy Price

Lea Kimmel

Eileen Hull Blog

Anna-Karin Evaldsson
Anne Redfern
Donna Budzynski
Diana Hetherington

You can find all of the Fabulous Stampendous products used in these gorgeous projects and connect with Stampendous by following the links below:
Shop Stampendous
Stampendous Blog

Looking for Sizzix dies to use your Stampendous products with?  You can find Eileen Hull's complete catalog below:
Shop Eileen Hull Sizzix Dies