Friday, January 31, 2014

Wild West Challenge!

Simon Says stamp challenge this week is........

Where the cowboy rides away!

Well what about the old west woman?

My challenge is for the woman of the west!

I wanted this to look like an old album, so I ruffed up the cardboard. 
I love the look of old worn vintage paper!
 I used Distress inks to achieve my old paper.

 Below I used Grungepaper and distress inks to achieve a leather look!
I think I achieved that!
 Lots of layers, I wanted it to appear as there were more pages. I love the page with the embossed stars. Do you see it there in the corner? A little post card popped in there and another page under that.

The tears and distressed edges in the grungepaper (leather) gives this a old vintage feel.
The whole page, hope you enjoyed my version of the old west!

Why not join in the challenge. Head over to Simon Says Stamps and check it out. 
Who knows you could be the next winner!

On another note....I will be crafting all week end in 2 days we have recieved over 30" of snow!
Oh the joys of living in the mountains!
Oh, by the way it is still snowing!

We have all this snow and it is still snowing! I'm freezing! Go to look at temp in house 58. Furnace is not working. Hubby to the rescue soon!Snowed so much that it covered the flew and the furnace shut down! Yep, sitting here thinking why is it so cold in here? Well I go check it was 58, so clicked the heat up and nothing.....notta! So hubby had to come home to clean off the area around the flew on the roof. I am starting to thaw out. It is getting warmer!
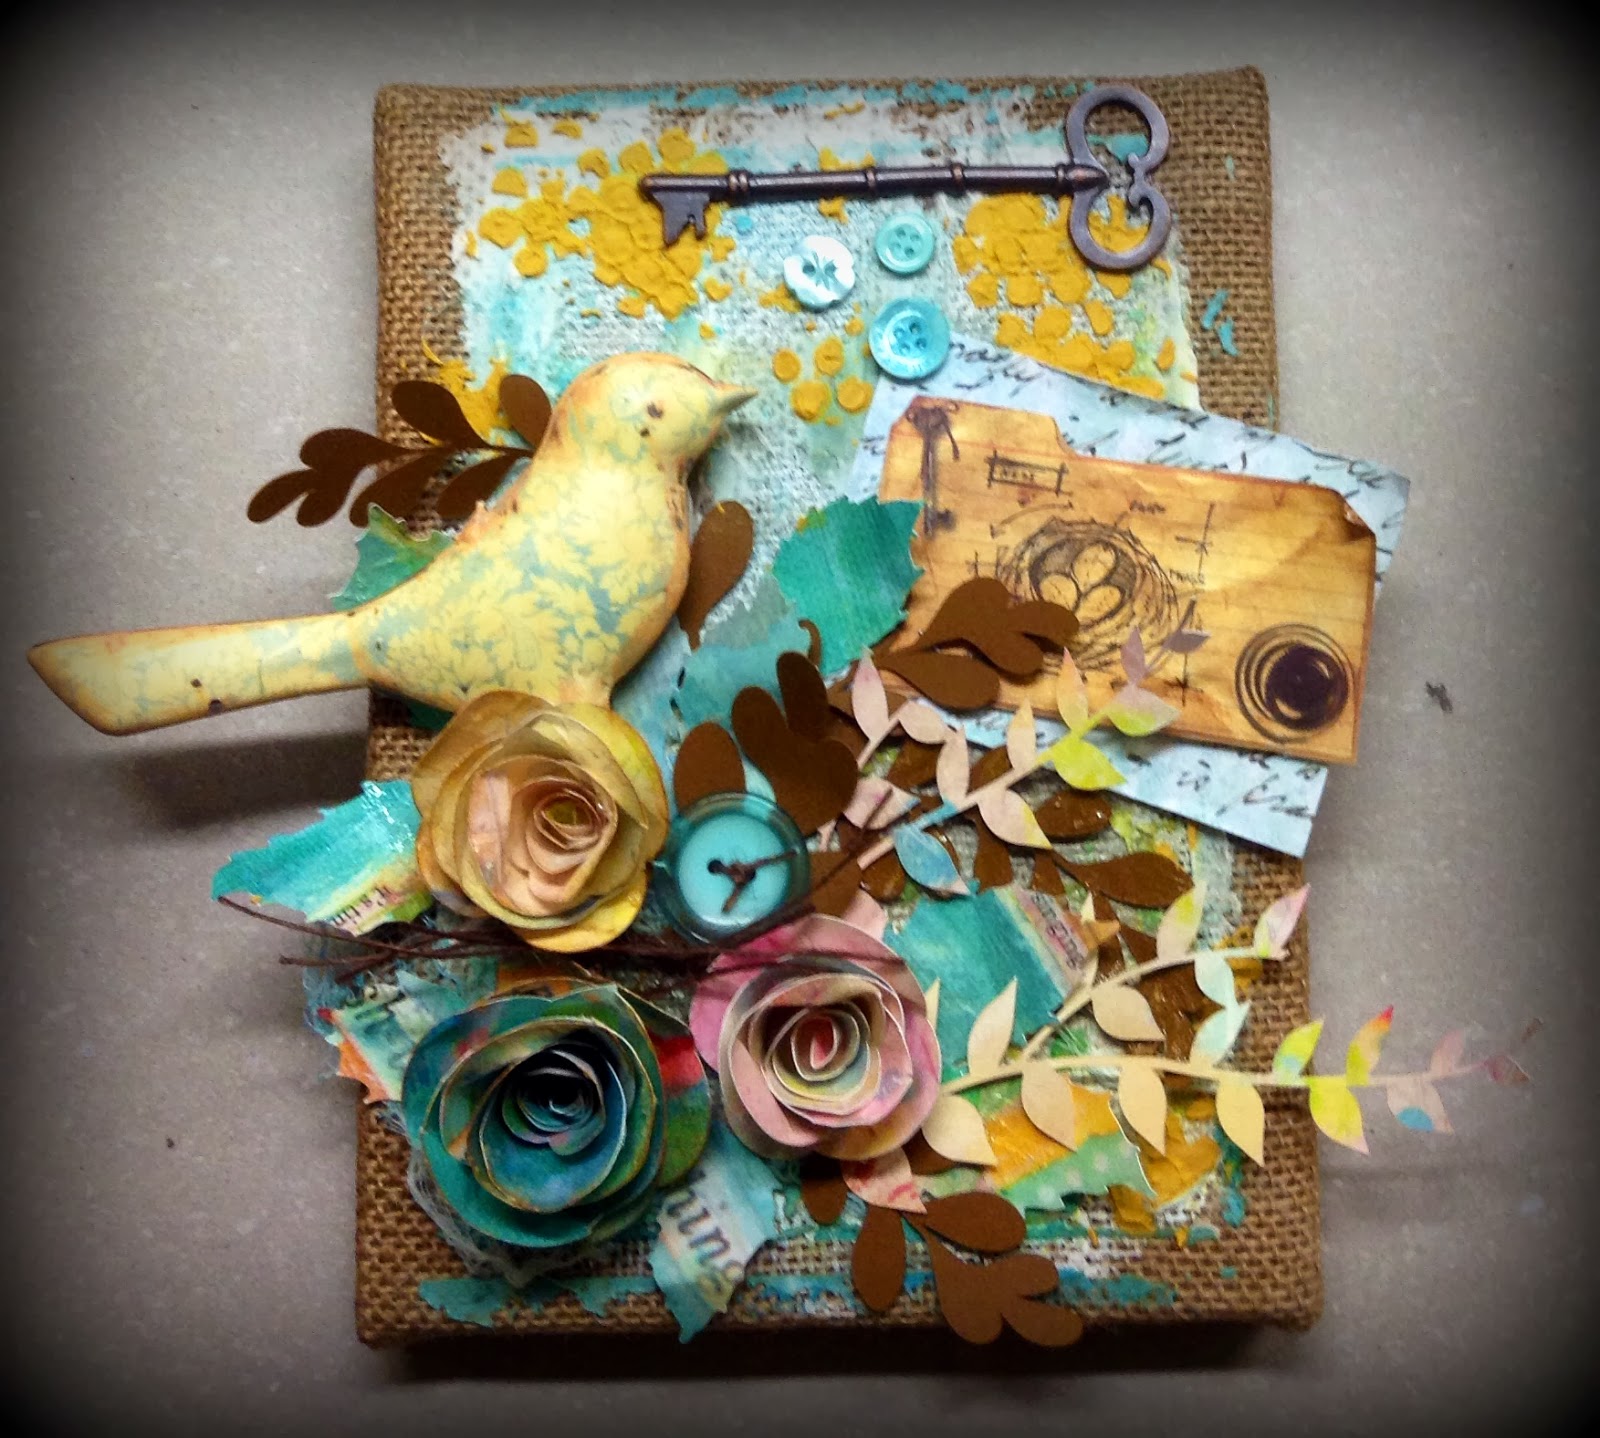
Stay warm!

Tuesday, January 28, 2014

Darn embossing paste......I Love You!

Today I was working on a new dress form. Key word...WAS!

I love making them, this one is going to be really awesome! I found a antique kerosene lantern bottom and I will be using it for the base. It is rusty and red and it will be very interesting. I have got as far as all the drilling and screws secured and dress form attached. I made the pattern and cut out the corset. I embossed the corset and have to sew it together. That's where it ended. I was getting frustrated in the fitting of her busts in proportion to her waist. So it is off to the side!


So what to do?
Play with embossing paste!

I have fallen in LOVE with Paste.....
Just like the 1st grade, when I ate paste.
Then in 3rd and 4th grade I would put it on my hands and face and let 
it dry, then peel it off like my skin was coming off!

But this time it is a Embossing Paste by Studio 490 - Wendy Vecchi!
I am going to have to go to embossing paste's anonymous!

Or my husband better get a raise, or I better get a job! Because at 
this rate, I am going to need cases of this stuff! Seriously LOVE it! 
I can't wait to get the crackle paste!

I am at the point I am making things out of my color comfort zone, flowers, me?
Since when?
At least I got a little grunge in this one. Not much though!

LOVE THIS!


 Wonder what tomorrow will bring? A card? Painting? Mixed media?

 None of the above....I can scrape the rest out of the jar and make something else! HA!

Wednesday, January 22, 2014

A is for..............Challenge

Simon Says Stamping challenge this week is.....

A is for.........

I have been wanting to join this challenge for a while but, my studio was in total chaos. It is so organized, I have been able to get so much more done.

So what starts with A?

How about Air Dry Paper Clay? Does that count?
Just want to share how I made the form. I used Tim Holtz die Sewing Room to cut out the form as a guide.
Once I cut it out of card stock I then just started to lay down the clay and start to form the dress form. That is the first time I have tried to make something out of the paperclay. Have to say I will be using it more. It was FUN! This did have to dry over night.


Okay then we have the color Aqua, that starts with an A!
Then also the paint color Antique Gold was used to mix with Wendy Vecchi's embossing paste.
This might be a stretch but AWESOME begins with an A and that's what I thought about Wendy's embossing paste. Loved it....or should say LOVE it!
And here it is all done! 

 Few different angles


Love the textures!


Final look at it all together.


 Hope you enjoyed your time here!

Thanks for stopping!


Tuesday, January 21, 2014

Day Two - Valentine's

 Well it is Tuesday, (really Sunday) and I am back to share
                three more cards I did using Cosmo Cricket.

I love this one! 
It is small and super cute and was really easy and fast. Same ingredients as yesterday...

Starlet Glitter Sheets
Wood Charms - Hearts
I cheated on the background paper here and used dare I say....Tim Holtz?
Little black paint

I cut my card stock to be slightly larger then the Wood Charm and adhered the background paper to the card stock. I painted my arrow, while it was drying I adhered the glitter sheet behind the hearts. I then just adhered the whole wood charm down with "the Ultimate Glue". By that time the arrow was dry and I added that to the Wood Charm with glue.

So CUTE! 

For this one, I painted a tree directly onto the paper. Just a basic tree, nothing special!
Painted a heart in the center to look as if it were carved. Added initials in the heart.
Then I wanted to use the Wood Charms in the tree, so I covered one with the Glitter Sheet. The other two I stamped a I and a U. Then added them to the tree using thread, eash of the hearts already have holes in them so it really make it so easy. I then just stitched around the card. Added the scrap of paper at the bottom and added an arrow onto it. I added the thread into the holes of the arrow and tied a bow.
Something different! I like different!


Third and final card out of this series of cards.
All done with the same materials. (except for that paper from Tim) and now (this piece of canvas below)

For this card, I used-
card stock                       Glitter Sheet
Sticky Back Canvas       Mini Deck - Creative Girl
Wood Charms               Tassel
Paint                              Gesso
and a very important element and it would be optional, but I loved it....Wendy Vecchi's embossing paste!

This one I just had fun with! Well, I had fun with all of them! I am just saying I had fun on this one a little more? I cut the canvas to fit on top of the card stock. I then gessoed the canvas and found the paints I wanted to go on. I used the gesso as the white and layered the paint on. Then I decided to add some texture using a stencil and Wendy's embossing paste. Then I had to wait for it to dry........waiting......waiting.....sip of pop. Oh it's got to be dry.......waiting.........DONE!

Now if I would have planned this, I could have just put the paint onto my mat and mix the embossing paste with the paint and it would have been done in one step! But, no! Not planned, never planned!

So I added a few layers of paint, scratched at the canvas to add more texture. Unraveled the outside lines of the canvas a bit. I stamped with paint onto the canvas with a little stamp XOXO.  I then cut out the heart from the Glitter sheet and added it, covered anther of the wood charms arrows with the Glitter sheet and snipped away the extra. Adhered the arrow and the Wood Charm "you" down. tied some twine and added a tassel. Couple strips of Creative Girl Mini Deck.


these two together. So Cute!

Here is all three together!

6 cards (3 from yesterday and 3 from today) with the basically the same ingredients, that I think each has it's own personality and look!

Tell my what you think......................!

Monday, January 20, 2014

A Day With Love-Cosmo Cricket Style

     Today (today means the other day) I decided I would make some Valentine's. I have the sweetest paper and Glitter sheets from Cosmo Cricket.

I thought it would be perfect for what I was going for................

LOVE!

This first one is just a sweet little note card.

Cosmo Cricket items needed to make this card?

Starlet Glitter Sheets
Tiny Text- Love
Mini Deck - Creative Girl

Do you see that jar topper back there in the picture? Don't you just love it? I do, I really do! You can get that from Cosmo Cricket also! (Trims and Jar not included) But the little love note is from the mini deck.

I love these Glitter Sheets! Seriously no glitter on my face, hands, up my nose, or on my dog! LOVE that!

This next card is the same ingredients as the first, except now we add the Wood Charms!
They are also from Cosmo Cricket! This one is called "Hearts".


This card was super simple.........Punch or die cut a heart and put the Glitter sheet behind it and add just a gem. I think it was perfect left at that point. But you could add the word Love, or Us.
 Just keep it real simple.

 All three together! Jeez! If you have no one to send them to, or you don't want to part with them.......You could also just keep them for Valentine's decor around the house!


Visit me tomorrow (that would be Tuesday) for 3 more ways to create with this line.

Tomorrow will be 3 more ways to use this line.......Hint....cards....mixed media?


Thursday, January 16, 2014

January Tag!

It's January and that means it's TIME for 
Tim Holtz's 12 tags of 2014

Here is Tim's tag and his blog, if you want to check it out!


Here is mine! 
I had to change mine a bit from his. 
Do you see the difference?

Let me tell you what I did........
                            I do not have this die, (sad face here) so I had to MAKE one.
                                                                                   That's right, MAKE ONE!
                             You know, get out the pencils and round shapes and make my own!
 So this is the start of my tag. Not to bad, if I do say so myself!
 So instead of the foil tape around the die, I exchanged it for some paint. I used a grey metallic.
                                         Still looks pretty good! The center is still with the foil.
 I did some extra shading on my painted die. Added my metal and adhered it down with Glossy Accents.
 I also added some bronze metallic paint in some areas. I really like how that looks.
Added my own words that apply to the new year for me!
I plan to find a new journey and leave the old one behind. Those that know me, know the struggles the last few years have brought. This is a New Year and things are going to happen, I will soar in 2014!
I also did not have the background stencil that Tim used, so I used Tim's Dot Fade stencil instead.
Freshly spattered!

 What else is different?
I changed sides, his pocket watch is on the other side.
 Oh I also added on of his metal corners. I painted it and sanded a bit off, then added just a bit of the bronze metallic to it.

 Here it is complete and close up. Now remember this was hand cut not a die cut.
                       Extra shading and new words that applied to me!
                                     I hope you enjoyed  my version of Tim's tag!

Thanks for stopping by!