Showing posts with label tim holtz. Show all posts

Tuesday, June 21, 2016

Eileen Hull and Crescent Framed Together!

Eileen Hull and Crescent Collaborate!


Today I have chosen to work with Crescent Photo Mat Art Board.
Eileen's new Flower - Heart & Soul
You will also need:
Crinoline fabric
Deco Art Media products
Card stock - I used Tim Holtz
Stencil
Beacon Fabri-Tac adhesive
Distress ink - Vintage Photo


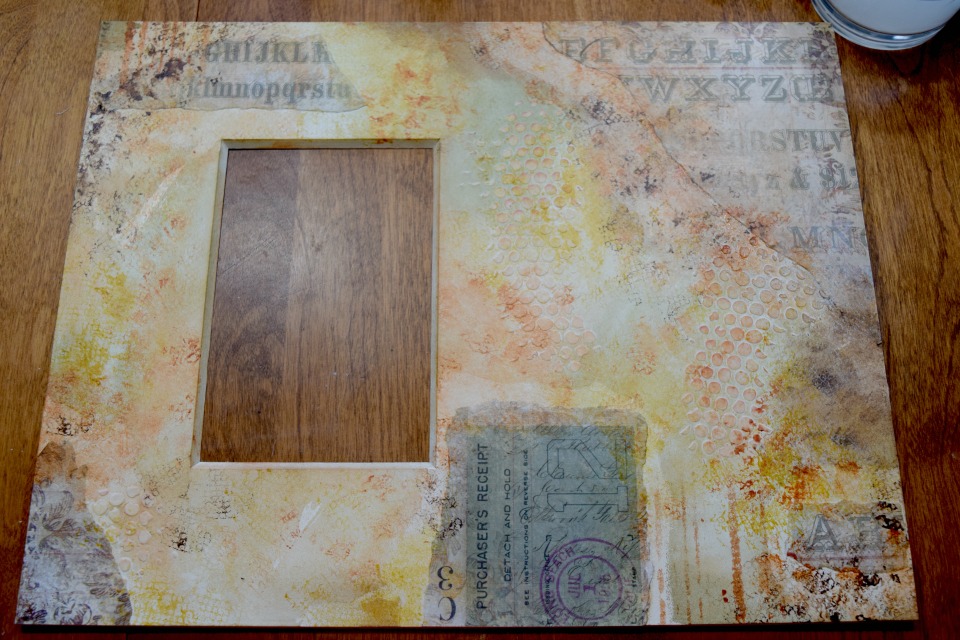
Using a stencil and DecoArt Media Modeling Paste, add some texture onto the Mat Art Board


Tear some paper and place on Art Board, move them around till they appeal to you
Using DecoArt Matte Medium adhere the torn papers to the Art Board

Here is mine

I decided to add some distress inks. Now set aside to let the Modeling Paste dry

Let's make flowers!
Love, LOVE, Love these new flower dies!
I am mixing new with the old. Really, the old are not that old!
Using Crinoline fabric cut out a bunch of flowers using the die Heart & Soul and the 
Thinlits Flower & Leaf Stitchlits


I made 2 large flowers and 4 small flowers


Lots of petals used. I wanted the flowers to really be full. This flower I used the sepal as a center to make it look like it is still opening


Adhered the 3 petals together and then the next three loosely adhered


Finished flower is GORGEOUS!

I also crumble the cuts to make the flowers look fuller.


Let's get our paint on to this Art Board.

I am using these colors for my palette.

I just lightly applied the fluid acrylics with a damp paper towel. I kept applying until I felt it was finished.
I used the computer to print out my saying and distressed the paper and inked it and adhere it to the Art Board using pop dots.

I adhered the flowers on with Beacon Mixed Media adhesive.

I also added a key hole  and some beautiful gems to the piece.

I still felt it was not done and added some distress inking using Tim Holtz's distress ink Vintage Photo


I have to say, I LOVED the way the paints and mediums went on to the Crescent Art Mat Board. I did receive this free as part of the collaboration but, in my opinion this is a great substrate to work with and I enjoyed working with it very much and would use it again and recommend it!

Once I was in LOVE with my piece, I added a vintage photo of my grandparents.


Popped it in a frame and it is Stunning, if I do say so myself!


Make sure you check out what the other DT members have done this month. Go to Eileen Hull blog to check it out!

Friday, November 13, 2015

Fall Candy Boxes

FALL CANDY BOXES

glue-dots-fall-box-feature
Designer Donna brings the fall foliage inside with fall candy boxes. Fill with treats or something special and give to your neighbors, friends, co-workers, or teachers.
Designed by: Donna Budzynski
Time: 1 hour for 6 boxes
Level: Beginner
Here’s what you need:
  • Glue Lines®
  • Ultra-Thin Glue Dots®glue-dots-fall-box-supplies
  • Twine
  • Cardstock – fall colors
  • Sizzix Little Sizzles Mat Board or small boxes
  • Distress ink – peeled paint, spiced marmalade, vintage photo-Tim Holtz
  • Archival Ink Wendy Vecchi – Potting Soil
  • Small Candy Bags (Optional)
  • Die Cut Machineglue-dots-fall-box
  • Die Cuts – Leaves
  • Die Cut 3D Block/Cube by Eileen Hull
  • Background Stamp – Something to add interest
  • Ink Blending tool
Here’s what you do:
  1. Die cut boxes (using Mat Board) and leaves (cardstock).
  2. Stamp background on all boxes using Archival Ink.
  3. Distress ink all boxes and leaves using blending tool.glue-dots-fall-box-complete
  4. Adhere boxes together using Glue Lines.
  5. Cut off the top flap of the box, so the box is open (optional).
  6. Adhere leaves to the front of the boxes using Ultra-Thin Glue Dots.
  7. Tie twine around the boxes as desired.
  8. Fill bags with candy of choice or peanuts.
**Use these for place settings by adding names to the leaves.
**Also write words of “Thanks” on leaves.
**Or just randomly place around the house for decorations with snacks.
~Donna
Any format of Ultra-Thin Glue Dots can be used:
ultra-thin-glue-dots

Monday, June 29, 2015

Celebrate 4th of July Home Decor


Art with Heart Challenge June Summer Fun with Sizzix | Eileenhull.com
Hey there!  Summer is right around the corner! At Art with Heart we are celebrating the upcoming Summer season with a new challenge for the month of June.  This months theme is Summer Fun with Sizzix!  Blow the dust off some of your old dies and get creative or treat yourself to some new Sizzix dies.  No matter how you choose to create you are sure to have some Summer fun when you get creative with Sizzix. 

I have chosen to Celebrate the 4th of July!

How did I make this? I used a few of Eileen's dies!

Thinlits die Banners & Pennants #660329
Thinlits die United States Map, Postcard #660328
Recipe Card & Label die #659870
Sizzix Mat Board
I threw in some of Tim Holtz Distress inks like vintage photo, barn red, and chipped sapphire. A few of Tim Holtz stickers and Flashcards. Even a few of his stamps!

Mix them all together and I now have the cutest 4th of July decor!

 I layered the stamped #4 over a watercolored effect background. Used some rub ons. Added some of Tim's stickers and the Flashcard celebrate!
 I LOVE Eileen's little star banner's! The little stars over the United States Map!
 I love each panel!
 I hope you have enjoyed my 4th of July home decor made with Eileen's great dies! Please join us every month for the Art with Heart challenge! Always a fabulous prize!

Thursday, December 18, 2014

ATB Christmas Boxes

I love the way these Christmas Boxes came out! 

If I do say so myself!


The boxes are a yearly gift.   My girls have grown and everything they ask for seems to be little. So I decided to start giving gifts in boxes that could be displayed year after year. This is like a 2 for 1.

Supplies:

      
·        Eileen Hull/Sizzix Scoreboard XL Die-Blocks/Cubes 3D
·         Glue Dots® 1” Glue Lines
·        Glue Dots® Micro (brads)
·         Sizzix Little Sizzles 6” X 13” Matboard White
·         Tim Holtz Paper Stash-Merriment
·         Tim Holtz idea-ology Collection Remnant Rubs Numbers
·         Tim Holtz Idea-ology Collection Hitch Fasteners
·         Tim Holtz Idea-ology Clock Keys
·         Left over red trim
·         Misc. brads
·         Red embroidery thread DMC
·         Small Misc. manila tag
·         Any snowflake stamp
·         Wendy Vecchi Red Geranium Archival ink

Directions:

1.       Cut boxes using Eileen Hull/Sizzix Scoreboard XL Die-Blocks/Cubes 3D and matboard
2.       Using Glue Dots® 1” Glue lines adhere boxes together
       (this in my opinion, is the best adhesive for this step)
3.       Cut paper to fit each box and adhere
      (6 pieces are needed for each box)
4.       Determine where Hitch Fasteners and Clock key will go and poke a small hole
       and attach each using the screws provided
5.       Adhere trim, add misc. brads and Rub ons
     (I cut the tabs off of the brads and used Glue Dots® Micro to adhere them to the box)
6.      Stamp the tag and tie with red embroidery thread


Make sure you stop by Eileen Hull blog as she is sharing fun projects all month long!


Thanks for stopping by!
Donna


Tuesday, August 5, 2014

Eileen Hull-Sneak Peek of Vintage Kitchen


We are giving you a sneak peek of Eileen Hull's new dies!

OMG! You are going to LOVE them!


Each of the DT have different items to share with you! We all have our own style to share, that means you will be able to see how versatile these dies are! Each and every design is different.

These dies are not yet ready and will not be ready until a later date. But we wanted to show you what is coming, so you can start saving your money for these awesome dies!

So here is what I came up with for the dies that I received...............

I used the coffee mug as a gift card holder


 Same coffee mug......I made it into a very easy painted picture for the coffee lover!
Next, I use the spoon for a get well card


 I LOVE this next one......so many ways you could use this. It is a cookie box!

This next one is also a favorite...So cute!

It's a recipe box holder, perfect for gift giving!

I used mine as a small outdoor journal box with journal cards. I loved the way it turned out.


Each of my designs I happened to use Tim Holtz paper and Wendy Vecchi's archival inks.
Rub ons are also from Tim Holtz.

Thank you so much for stopping by. Remember these dies will be available at a later date and were just debuted at the Paper Art show. Look for these dies later this year. Check the other DT member blogs as they have different dies from what I have. You may just find more to put on your must have list. I know I have.


Tuesday, July 17, 2012

Cosmo Cricket Sample - Wanna see?

The next few days I will be sharing some samples that I did using Cosmo Cricket's NEW lines. Your going to love the new things they have.
Have you seen the buttons? To die for! LOVE them!
How about a I show you them?

 I heart these!
These buttons are wood. They are adorable!

The project I have for you today is made from the new line

I started with a wood box, added some metal feet (Advantus,tim holtz), painted box and metal feet. After it was dry it was time to cut into the yummy paper. But not only that, this line has stamps to go with it!
SEE!
So I used one of the Element Deck papers and started to work around that. This is what I came up with!
Hope you enjoy!


 Close up of flowers and metal handle

Surprise! There is a mini book inside! See where I used the stamps? I stamped the image to mimic the outside of the box, but inside it is colored. I love to color! Each side of the paper is stamped with the scallops.

Well that is my share for the day! I really enjoyed working on this and all of the samples.
See you Thursday when I bring you another sample!