Thursday, November 5, 2015

Wooden Snowman made with Glue Dots®


glue-dots-wooden-snowman-feature

Designed by: Donna Budzynski
Approximate time: 1 Hour
Level: Beginnerglue-dots-wooden-snowman-supplies
Size: 6” X 36”
Here’s what you need:
  • Glue Dots® Advanced Strength
  • 1 slat from a wood pallet or a board 1” x 36”glue-dots-wooden-snowman-inprocess
  • 1 slat cut to 14” – approximate size 3” x 14”
  • Small wood triangle for nose
  • Misc. buttons
  • Paint – White, burnt orange, black
  • Fabric or old scarf
  • Paint brushes
  • Table sawglue-dots-wooden-snowman-finished
Here’s what you do:
  1. Cut all wood to size yourself or have your local home improvement store cut it for you (they should cut it for free if you purchase the wood from them).
  2. Paint the top quarter of the 36″ plank black.  Paint the remainder of the wood slat white and let dry completely.
  3. Paint the skinny 3″ x 14” slat black and let dry.  This will be the brim of his hat.
  4. Paint nose burnt orange and let dry.
  5. Using Glue Dots Advanced Strength adhesive, assemble snowman by adhering the brim, nose, and buttons to the board. Tip: place items in position until you are happy with the look of your snowman. Add Advanced Strength adhesive to the back of each item and press firmly into place for a strong secure bond.
  6. Tie scarf around the plank where the snowman’s neck would be.
  7. Paint mouth and let dry.
~Donna
To complete this project either format of Advanced Strength will work:
advanced-strength-glue-dots

Monday, October 26, 2015

Glue Dots® and Stampendous Halloween Blog Hop!

glue-dots-stampendous-blog-hop-feature


I love fall. The crisp cool air, changing of the leaves and Halloween!


Today I have made two projects for you!


I was sent this Awesome set of stamps! Also some Glitter!

Thank you so much Stampendous!

Skeleton Style Perfectly Clear Stamps

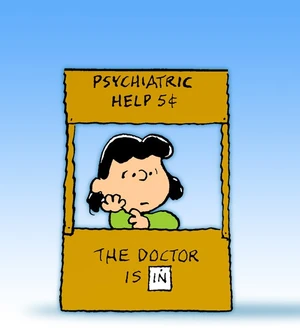
The first thing I thought of was......Lucy from Charlie Brown!

Remember this?

Lucy-van-pelt-1-

So off to work I went! 

I had a circle canvas board, I painted the background to look like the sun had set and it was orangy-yellow and it set the mood for the rest of the plan! (Sorry I lost the pictures for this step) OOPS!

I stamped out some Skeletons and cut them out! I also cut out quite a few bats!


 I had to draw out a desk for him to sit at! I wanted it to be a rickety desk, so I made it look as if it were made of pallets! This was a fun challenge for me! I cut it out and roughed it up a bit with sand paper.

Kinda cute! (I think)

Here you can see I added mini Glue Dots® to adhere the desk down onto the canvas.


 I started to build my canvas up. I stamped spiders and bats.


I adhered the bats on the already stamped bats to give it depth! Some I adhered two and some three, this gives the appearance of wings flapping! I used Glue Dots® Mini for this.


 Here is the finished piece once everything was added!

 So much fun!

 Next I had to make a card with one of the cute hats!
Again stamped and cut out the skeleton and a hat, using the same stamp set! The background stamp is also a Stampendous stamp by Andy Skinner!
I glittered the edges of the paper and the hat!
 Time to use those handy dandy Glue Dots®!
Who knew a spider could be so cute? 

 Finished card! I love it! I hope you do too!

 Thanks for stopping by and make sure you stop at all the blogs and see what other spooky fun you can find!

Dawn
Donna - Your here!
Robyn
Grace

STM_GD_prize
Glue Dots® Craft Dots 3/8”
Glue Dots® Mini Dots 3/16”
Glue Dots® Removable Dots 3/8”
CRS5080 Cling Create Christmas Stamp Set by Stampendous®
DCS5080 Create Christmas Die Set by Stampendous®
MGK02 Christmas Micro Glitter Kit by Stampendous®
Just comment on both company blogs and all the design team posts for our hop with Glue Dots. Commenting is open until Sunday, November 1st at 11:59 pm and winners will be announced sometime on Monday, November 2nd. See Official Contest Rules.

Wednesday, October 14, 2015

Mini Holloween Treat Boxes


MINI GABLE BOXES FOR HALLOWEEN


glue-dots-mini-ghost-box-feature
Designer Donna is on our blog to show you how to decorate Mini Gable boxes for your Halloween Party. You can fill these with candy, party favors or little Halloween goodies for your classroom.
Designed by: Donna Budzynski
Time: 30 Minutes
Level: Beginner
Size: 5.125” x 4” W x 2.5”Dglue-dots-box
Fast fun treat boxes for Halloween!
Here’s what you need:
  • Craft Glue Dots®
  • Mini Gable Boxes
  • Ribbon
  • Archival Ink Ranger – Jet Black
  • DecoArt Media Mister Carbon Black
  • DecoArt Media Mister Orangeglue-dots-ghost
  • Die Cutting Machine
  • Die cut ghost
  • Stamp numbers
  • Spray box
  • White cardstock
  • Black pen
Here’s what you do:
  1. Spay mini gable boxes using DecoArt Media Misters, once with black,  then with orange and let dry.
  2. Stamp number 31 on each box using Archival ink jet black.
  3. Assemble the box and use Craft Glue Dots if needed to keep it sealed.
  4. Use your cutting machine and ghost die to make little ghosts from white cardstock. Remember to add eyes to your ghost with a black pen or marker.
  5. Adhere your ghosts to front of gable box using Craft Glue Dots.
  6. Fill with goodies and tie ribbon around handle.
What will you fill your mini gable box with?
~Donna
Either format of Craft Glue Dots can be used to complete this project:
craft-glue-dots

Tuesday, October 13, 2015

Art with Heart Challenge October : Hauntings and Holidays

Hello All!  The fall season is in full swing and *gasp* the holidays are right around the corner!  This October our Art with Heart Challenge is Hauntings and Holidays. For all of you Halloween enthusiasts we want to see your creepiest creative ventures and for those of you who like to get ahead of the hectic, holiday season feel free to share your magical, makes of merriment.  The Inspiration Team will be working with gorgeous papers from Eileen's Paper Trail 7 sponsors Graphic 45 this month.  Each week you’ll see amazing Holiday projects created with my Sizzix dies and Graphic 45.
I have chosen Eileen Hull Train Case! 
I love this Train case it is so versatile! 
Dare I say, I am in LOVE with Graphic 45 Rare Oddities Paper! Oh my!!! Graphic 45 always has great lines to work with! The feel and the smell, like the 4th of July! Ohhh, ahhh........!

My project is the Rare Oddities shoppe! Just remember the windows can see into your soul! 
 Such a cute display for your ghoulishly haunted area!
 Have you ever done this? Be careful!
I burned my edges, yes I did! It makes for a fantastic rare uneven line for the roof!
 A witch's hat painted and sanded and stained with a few bottles added to the side makes the perfect stand for the Rare Oddities Shoppe!
 Pop some candy inside or a mini altered book and it is a two for one!

Finished Project!
Sorry no step out's this time. I was way to involved in the paper! It is very distracting!!!
Hope you like my little shoppe!

Don't forget to join us for this months challenge! Always a prize!!!
Come on enter!  HERE!

Tuesday, October 6, 2015


Did you know you can get awesome project sheets on Canvas Corps Blog?

These are just a few that I have done, but they have more!

All materials and how to's are right there in that project sheet.

Make sure to check them out while roaming the web!

Perfect for that man cave/bar area


Outdoor garden signs are always a great addtion to your outdoor living area!

Thanks for stopping by!
Donna

Tuesday, September 22, 2015

Favorite Fall Things-Eileen Hull Style

 Art with Heart Challenge September "Favorite Fall Things"
It's that time.....the warm breeze has turned to a cool brisk breeze, the trees are changing colors! I am getting some gorgeous colors here in the mountains! 

Are you ready for FALL? 

Here at Art with Heart we a gearing up and showing you what we can do with Eileen Hull's dies!


 I have actually made two this month!

My first is using Eileen's Train Case! You can find it by clicking on the highlighted words.

 First I gathered my inks (Wendy Vecchi inks were used), Train Case die,mat board, and Glue Dot® Lines.

Once I had all my pieces cut from my Sizzix's Mat board, I embossed them! I love the way they turned out!
Look at the detail, it gave this Train Case a rich FALL feel! I started to ink my Train Case using Wendy Vecchi inks! I love the rich Fall color I achieved with Wendy's inks!

I put my Train Case together.
 I added a gold rub onto the hinges.
Finished off the Train Case with a Tim Holtz Key hole and some fall flowers and a few leaves and acorn embellishments! This Train Case makes a beautiful floral decor piece for your home. I love the way this turned out. Could also make a great hostess gift!

 My second one is my "When is a camper not a camper? When it's a pumpkin!" project!
So cute! This is made with Eileen's Travel Trailer Die!

Just turn the Trailer on it's side and don't put one side of the Trailer on. Add a hand cut stem and you have a pumpkin!

Wouldn't this look beautiful on your Thanksgiving table at each table setting? Pop a treat into the opening and it serves as a gift box!
 I added Fall colored M & M's! (I ate my Candy Corn)
 My two projects look FABULOUS together!


I hope you like what I have shared this week!

Make sure you join us this month's prize is the Travel Trailer! You could make your own FALL pumpkins! Enter at Art with Heart.